
Sick of dodging raindrops and battling snowflakes? I’ve got you covered – literally! Imagine a world where water slides off your jacket like a duck in a pond. That’s right, no more soggy socks or damp hairdos. Say hello to your new best friend: homemade water repellent!
Forget pricey store-bought solutions – we’re getting crafty in the kitchen. With just a few simple ingredients and a sprinkle of DIY magic, you’ll be waterproofing everything in sight. From umbrellas to shoes, nothing is safe from my water-repelling wizardry.
Understanding Water Repellents
So, you’re tired of rain and snow getting in the way of your adventures? Fear not, my waterproof comrades! Let’s jump into the area of water repellents and become masters of keeping dry in style.
What is Water Repellency?
Water repellents are like personal bodyguards for your stuff, creating an invisible shield that tells raindrops, “You shall not pass!” These magical solutions coat surfaces, making water bead up and roll right off like a clumsy penguin on ice. Say goodbye to soggy shoes and drenched jackets!
- Stay Dry, Stay Fly: Say hello to a world where rainy days are just an excuse to show off your now waterproof gear.
- Long Live Your Stuff: Protect jackets, shoes, bags, and even hats from the wrath of water, extending their lifespan and your wallet’s happiness.
- DIY Delight: Forget the fancy store-bought options! Embrace your inner chemist and whip up your water-repelling concoction with ease.
- Versatile Magic: Did someone say multipurpose? From umbrellas to tents, give everything a touch of waterproof magic.
Common Ingredients in Homemade Water Repellents
So, you want to play chemist and whip up your homemade water repellent, eh? Well, let’s jump into the magical world of concoctions and protect your gear from the rain and snow. Here are some common ingredients you can use to create your liquid shield:
Natural Oils and Waxes
- Beeswax: The nectar of bees that not only makes candles but can waterproof your stuff too!
- Olive Oil: Not just for salads—it adds a slick touch to your water repellent mix.
- Coconut Oil: From piña coladas to protecting your favorite jacket, this oil does it all.
- Jojoba Oil: Pronounced ho-ho-ba, this oil is serious about shielding your belongings.
- Silicone Sealant: Not just for your bathroom—seal out the wet with this versatile ingredient.
- Silicone Oil: A slick solution to your waterproofing problems—just a few drops will do the trick.
- Silica Gel: No, it’s not a fancy dessert. It’s a drying agent that can help keep your gear dry.
Get ready to mix, match, and conquer the rain and snow with your personalized water-repelling potion! Time to show Mother Nature who’s boss.
DIY Water Repellent Recipes
So, you’re tired of the rain and snow playing games with your favorite items? Fear not, dear reader, for I’m here to sprinkle some DIY magic into your life with these fantastic water-repellent recipes. Let’s jump into creating your secret potions to defy the wet and wild weather!
For Clothing and Fabrics
When it comes to keeping your clothes dry and your fabrics fabulous, here’s a quick recipe to whip up your very own water repellent spray. Here’s what you’ll need:
- Beeswax: 2 parts
- Coconut oil: 1 part
- Silicone sealant: a dollop
- A touch of creativity
Melt the beeswax and coconut oil together, add a bit of silicone sealant, stir in some creativity, and voila! You’ve got yourself a personalized water-repellent spray to spritz away the rainy day blues.
For Glass and Windows
Don’t let streaky windows dampen your day – whip up this simple recipe to keep your glass surfaces squeaky clean and water-resistant. Gather these ingredients:
- Silicone oil: 3 parts
- Water: 1 part
- Microfiber cloth: for buffing
Mix the silicone oil and water, grab your trusty microfiber cloth, and say goodbye to water spots and blurry views through your windows. It’s as clear as that!
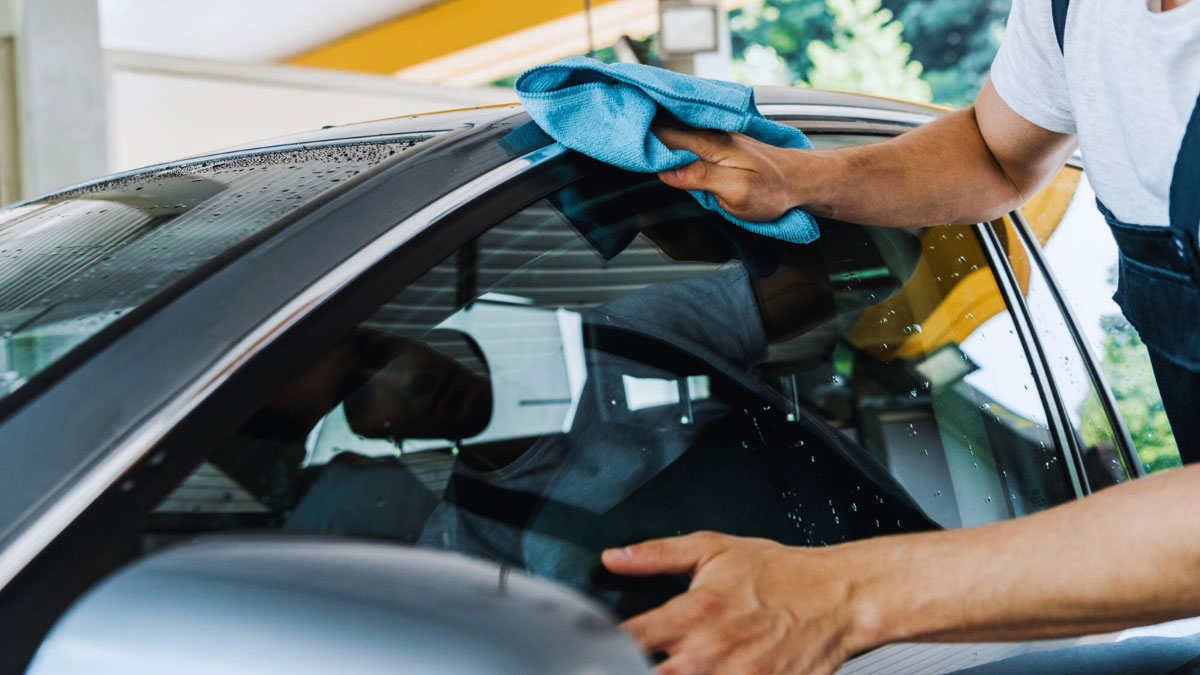
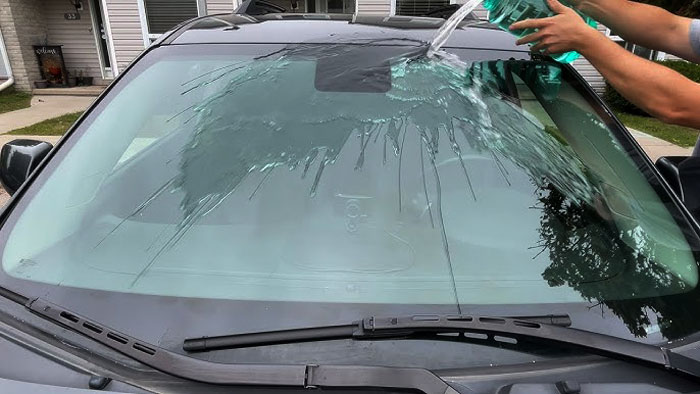
For Car Exteriors
Your car deserves some love too, especially when it’s braving the elements every day. Try this DIY water repellent recipe to give your car’s exterior that extra protection it deserves:
- Silica gel: a generous sprinkle
- Warm water: to dissolve the gel
- Sponge or cloth: for application
Sprinkle the silica gel, dissolve it in warm water, grab your sponge or cloth, and give your car exterior a water-repelling shield that could make even the rain jealous. Your car will thank you for this extra layer of protection!
Applying Your Homemade Water Repellent
Alright, let’s get our hands dirty and start applying that homemade water repellent we whipped up earlier. Get ready to waterproof like a pro with these simple steps!
Tools and Materials Needed
Here’s what you’ll need to get the job done:
-
Clothing and Fabrics Spray
- Beeswax
- Coconut Oil
- Silicone Sealant
-
Glass and Windows Solution
- Silicone Oil
- Water
-
Car Exteriors Recipe
- Silica Gel
- Warm Water
Step-by-Step Application Process
Time to waterproof your gear with these easy steps:
- Prepare the Surface
- Clean and dry the item you want to treat to ensure the best results.
- Apply the Water Repellent
- Use a clean cloth or brush to evenly spread the homemade solution on the surface. Be generous but avoid oversaturation.
- Heat-Set (For Clothing and Fabrics)
- After applying the mixture, use a hairdryer or iron on a low setting to heat-set the repellent into the fabric.
- Dry and Cure
- Allow the treated item to dry completely before using it. For fabrics, consider curing them for a day or two before wearing or washing.
- Buff and Enjoy
- For glass surfaces, buff the treated area with a clean cloth to bring out that streak-free shine. For car exteriors, buff and admire your water-beading masterpiece!
Safety and Precautions
When working with chemicals, safety should always be a top priority. Here are some handy tips to ensure a smooth and accident-free application process:
Handling Chemicals
- Protective Gear: Don’t fancy a new tie-dye look with those chemicals? Get your hands on gloves, goggles, and a mask to keep yourself safe.
- Ventilation: Let your space breathe! Work in a well-ventilated area to prevent inhaling those potent fumes.
- Avoid Skin Contact: Unless you’re going for a futuristic pattern, keep those chemicals off your skin. It’s all about waterproofing, not skin art.
- Cleanup: Spills happen, but don’t leave them unattended. Clean up any spills immediately to avoid unwanted accidents.
- Regular Checks: Keep an eye on your treated items. If they start looking a bit too friendly with water again, it might be time for a touch-up.
- Reapplication: Like sunscreen at the beach, a fresh coat is essential for continued protection. Don’t skimp on reapplying when needed, unless you enjoy surprise soakings.
- Storage: Store your DIY water repellent in a safe place, away from curious hands or paws. We don’t want any impromptu waterproofing experiments happening by accident.
Conclusion
Well, there you have it! We’ve dived into the world of DIY water repellents to shield your stuff from the relentless rain and snow. From beeswax to silicone oil, we’ve concocted some nifty recipes for all your waterproofing needs. Remember, safety first when dealing with those chemicals – goggles on, windows open, and no skin contact! Don’t forget to keep an eye on your gear, reapply when needed, and store those repellents safely. Now go forth, armed with your newfound knowledge, and conquer those rainy days like a pro! Stay dry out there, folks!
Frequently Asked Questions
What are some homemade water repellents recommended in the article?
The article recommends DIY water repellents using beeswax, coconut oil, silicone sealant, silicone oil, and silica gel for various items such as clothing, fabrics, glass, windows, and car exteriors.
What safety precautions are emphasized when working with homemade repellents?
Safety precautions highlighted include wearing protective gear, ensuring proper ventilation, avoiding skin contact with chemicals, and following proper cleanup procedures to minimize risks.
How often should the water repellent be reapplied for effective waterproofing?
Regularly checking and reapplying the water repellent is crucial to maintain its effectiveness against water damage and ensure long-lasting protection for the treated items.
What is the significance of safe storage when using homemade water repellents?
Safe storage of homemade water repellents is essential to maintain their quality and effectiveness over time, preventing potential hazards and ensuring their usability for future applications.