
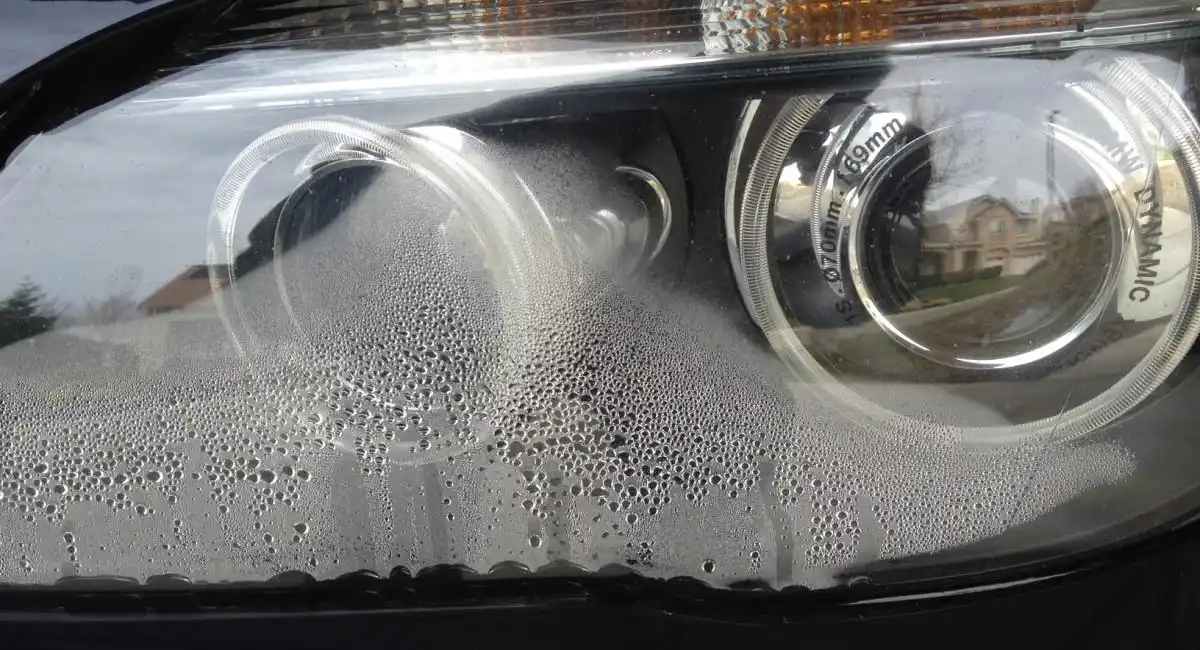
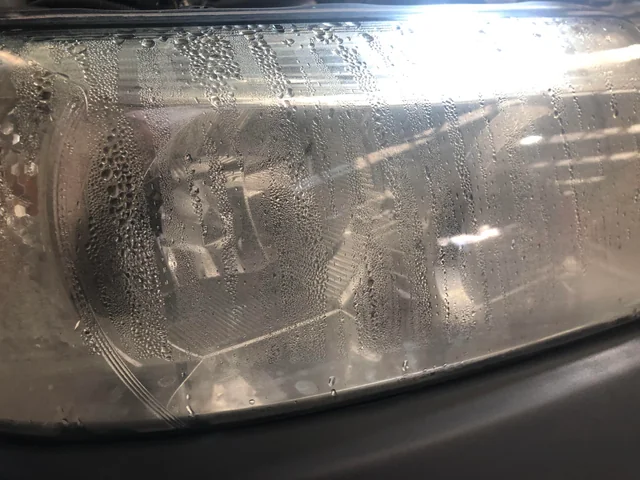
Ever felt like your car’s headlight was auditioning for a role in a fish tank? Yep, that pesky moisture buildup can really cramp your car’s style. But fear not, fellow drivers, for I’ve embarked on a mission to banish that foggy headlight look once and for all.
Picture this: you’re cruising down the road, feeling like a boss, when suddenly your headlight decides to throw a moisture party. Not cool, headlight, not cool. But worry not, my friends, for I’ve got some tricks up my sleeve (or under the hood, rather) to kick that moisture to the curb.
Tools and Materials Needed
When tackling the task of ridding your headlights of pesky moisture, we must arm ourselves with the right tools and materials. Let’s make sure we have everything we need before we jump into this headlight-saving adventure!
List of Tools
- Microfiber Cloth: This trusty sidekick will help us wipe away any moisture from the headlight surface.
- Heat Gun or Hair Dryer: A heat gun or hair dryer will aid in evaporating the trapped moisture inside the headlight.
- Phillips Head Screwdriver: We might need to remove screws or access panels, so this tool is essential for the job.
- Silicone Sealant: To prevent future moisture intrusion, a good quality silicone sealant will do the trick.
- Rubbing Alcohol: Use rubbing alcohol to clean the headlight lens before sealing it up.
- Clear Tape: This will be handy for temporarily sealing any gaps during the process.
- Headlight Sealant Kit: Investing in a headlight sealant kit will ensure a professional and long-lasting result.
- Plastic Gloves: Keep your hands clean and protect them from any chemicals during the process.
Step-by-Step Guide to Removing Moisture
Removing moisture from your headlight is like giving it a much-needed spa day. Let’s get those lights shining bright again with these simple steps!
Step 1: Access the Headlight
Grab your tools and let’s immerse! First, locate the screws holding the headlight in place. For most vehicles, it’s usually a couple of easily accessible screws. Unscrew them using your trusty Phillips head screwdriver. If your headlight is sealed, gently pry it open with care.
Step 2: Dry the Interior
Time to dry out that headlight spa! Use a hairdryer or heat gun on a low setting to blow warm air into the headlight. Move the dryer around to ensure even drying. Remember, we’re treating the headlight, not giving it a blowout, so be gentle and patient.
Step 3: Check and Replace Seals
Inspect the seals around the headlight for any cracks or damage. If you notice any issues, it’s sealant time! Apply a generous amount of silicone sealant to create a watertight seal. This step ensures that moisture stays out for good.
Step 4: Reassemble the Headlight
Put those puzzle-solving skills to use! Carefully reassemble the headlight, making sure everything fits snugly back into place. Use clear tape if needed to secure any loose parts. Once everything is back where it belongs, step back and admire your handy work—moisture begone!
Preventing Moisture Buildup
Ah, let’s talk about keeping those headlights clear and dry like they just had a day at the spa! Here are a few tips to prevent moisture buildup and ensure your headlights stay crystal clear.
Tips on Parking and Usage
- Park Strategically: Try to park your car facing away from the sun to prevent excessive heat buildup that could lead to condensation.
- Regular Ventilation: Open your car windows or sunroof slightly to allow fresh air circulation, reducing the chances of moisture accumulation inside the lights.
- Avoid High-Pressure Car Washes: Those high-pressure jets can sometimes force water into places it shouldn’t be, like your headlight seals. Opt for gentler wash methods.
- Use Headlights Wisely: Try not to leave your headlights on when the car is turned off. This can create heat that contributes to moisture issues.
- Inspect Seals: Periodically check the seals around your headlights for any signs of wear or damage. Replace them as needed to maintain a tight seal.
- Safety First: Clear headlights are crucial for visibility while driving, especially in hazardous conditions. Regular checks ensure optimal performance.
- Prevent Costly Repairs: Moisture buildup, if left unchecked, can lead to corrosion and damage to electrical components, resulting in expensive repairs. Regular maintenance can save you money in the long run.
- Clear Vision: Foggy headlights can obstruct your vision, increasing the risk of accidents. Keeping moisture at bay ensures clear visibility on the road.
- Longevity of Headlights: By preventing moisture buildup, you also extend the lifespan of your headlights, saving you from premature replacements.
Troubleshooting Common Issues
When you’re dealing with foggy headlights, a few common issues might pop up as you work on removing moisture. Let’s tackle them together with a hint of humor!
Difficulty in Accessing the Headlight
- Stuck Like a Pickle Jar: If accessing your headlight feels like opening a pickle jar, don’t worry, you’re not alone. Sometimes those screws just won’t budge. Take a deep breath, maybe a sip of your favorite beverage, and give it another shot. Persistence pays off!
- Tool Talk: “Do I really need all these tools?” If your toolbox is giving you a headache, fear not. Sometimes, one screwdriver does the trick, and other times, you might need an entire arsenal. Embrace the challenge—one tool at a time.
- Hidden in Plain Sight: Ever felt like you’re searching for hidden treasure when trying to find the headlight? It happens to the best of us. Stay calm and start your headlight hunt from different angles. Who knows, you might stumble upon it sooner than you think!
- Good Ol’ Resilient Moisture: That moisture just won’t budge, huh? It’s like that one guest who overstays their welcome at a party. If the stubborn droplets keep coming back, recheck your sealing and ventilation. Sometimes, a little extra care is all it takes.
- The Sneaky Leak: Is there a sneaky leak playing hide and seek in your headlight? It’s time to channel your inner detective and track down the source. Check for cracks, loose seals, or even tiny holes. Once you find the culprit, patch it up like a pro!
- Pesky Humidity Problems: Humidity loves to play games, especially with headlights. If your headlight keeps fogging up, consider using anti-fog solutions or silica gel packs inside the assembly. Show that humidity who’s boss!
Frequently Asked Questions
How can I prevent moisture buildup in car headlights?
To prevent moisture buildup in car headlights, try parking your car strategically, ensuring regular ventilation in the headlights, using gentle car wash methods, being cautious with headlight usage, and inspecting seals for any damage.
How can I troubleshoot persistent foggy headlights?
If you’re facing persistent foggy headlights, try checking for difficulty accessing the headlights, dealing with resilient moisture, finding sneaky leaks, and managing pesky humidity issues. Consider using anti-fog solutions and silica gel packs for humidity control.
What household items can I use for DIY headlight restoration?
For a DIY headlight restoration, mix baking soda with vinegar to create a fizzy paste. Apply the paste to your headlights, let it sit for a few minutes, then wipe it off with a soft cloth for shinier headlights.
Can I use a magic eraser to clean foggy headlights effectively?
You can use a Magic Eraser to clean cloudy headlights effectively. Wet the eraser and scrub the outside of the headlight to remove built-up grime. Note that it may not work as well on extremely dirty headlights.
Does WD-40 help remove headlight haze?
Using WD-40 can help remove headlight haze effectively. Apply WD-40 to a cloth and gently rub it onto the headlights to clean and restore clarity, saving money compared to other costly options.
Conclusion
So there you have it, folks! Dealing with foggy headlights is no longer a mystery. Remember, a clear headlight is not just for show; it’s for safety and longevity. From strategic parking to anti-fog solutions, we’ve covered it all. No more sneaky leaks or pesky humidity problems ruining your drive. Just a few simple tricks and tools, and you’ll be cruising with crystal-clear headlights in no time. So, next time you see moisture creeping in, don’t panic – tackle it head-on with confidence. Happy driving, and may your headlights always shine bright!